As promised, this year we are doubling down on the things that matter to us—sustainability, inclusivity, and creating truly great products with joy.
Our "Make it Yourself"; ethos is deeply embedded in our daily dairy operation, where we
produce cheese, soaps, and balms. But beyond that, making things has always brought us joy. I never considered myself an artistic person, yet I find deep satisfaction in crafting beautiful things from wool. A century ago, the average rural person made many of their own essentials—clothing, bedding, soap, leather goods, baskets, wooden toys, and instruments, not to mention bread, butter, and all kinds of pickled foods. In Germany, the hardships of WWII and the years that followed kept those skills relevant. My grandmother raised sheep for wool, meat, and milk, saying, "They got us through the war."
But it's not just about physical necessity. When I was a child, my grandmother spent years
collecting down to make us featherbeds for our weddings. I brought my duvet with me from Germany, and while I only use it on the coldest nights, having it here on the farm warms my heart all the time!
Of course, I don’t have time to make everything I’d love to—willow weaving and leathercraft look exciting, but there just aren’t enough hours in the day. That’s why felting is perfect! It’s quick, deeply satisfying, and allows me to create beautiful, useful things all at once.
Think of the "Make it Yourself;" philosophy as a spectrum. On one end, you have incredibly
practical goods—like homemade cleaning products—that save money, benefit the environment, and support your health. On the other, you have items that allow you to express your creativity and bring beauty into your life. Felting falls right in the middle.
There are also hand made goods whose cost- both in money and time are high and others that actually save time/and or money. Butter and bread come to mind here… it’s cheaper to buy butter than it is to get a cow, milk it and then churn your butter but baking bread is an actually frugal thing to do!
This year on the blog, we’ll explore a variety of projects across the spectrum. Our focus is on projects that a done in one sitting, relatively inexpensive and don’t require prior knowledge. Be sure to sign up for our newsletter—we’ll let you know when new projects go live. And we’ve also started a YouTube channel so we can share how-to videos!
We are all creative. We are all artists. And we can all make things with our own hands. Without more ado… Project #1. Sock to Heart! (Written instructions below)
Merino wool socks are a pleasure to wear and many folks own them…until they develop holes in the heel or the toe and we toss them out with some regret. Such nice wool fabric, what a waste!
Here is something you can do with them! It requires one sock – must be mostly wool, as in at least 70%-
How to Make a Felted Wool Heart Diffuser
Materials Needed:
-One wool sock (70% or more wool)
-1/4 oz of wool top (Wool top is a smooth, combed wool fiber used for felting; you can
find it at fiber arts stores, online marketplaces, or specialty craft shops.)
-A piece of mild soap (like our goat milk soap or Castile soap)
-A piece of bubble wrap
- A sharp pair of scissors
- A nylon stocking or sock
- A rubber band
- Warm water
- A bowl
- A towel (for drying)
- NOT necessary but nice to have just in case…..a felting needle. Every wet felted
object can be patched up by adding more wool and needle felting it on.
Instructions:
Step 1: Prepare the Wool Sock String
1. Cut the sock into a strip about a finger’s width.
2. If the strip tears, simply knot the ends together.
Step 2: Shape the Heart Base
3. Wrap the sock strip around your outstretched fingers to form four large loops.
4. Slide the loops off your fingers and tie a tight knot in the center.
5. This will create a center knot with two loopy ends.
6. Use the remaining string to wrap around the loopy ends, shaping two halves of a heart
with a tip in the center. With the last bit of string tie the base of the heart where the knot
is tightly together so that the loopy ends have a proper base.
Step 3: Cover the Heart with Wool Top
7. Take a small amount of the wool- a pinch, maybe 10% of it and set it aside. You can use
this if you end up with bare spots. If you have more than the ¼ oz of top on hand you
don’t have to reserve any! Divide the wool top into three even thin layers.
8. Gently spread the wool over the heart base, covering it completely and evenly.
9. Make sure there are no bald spots.
Step 4: Secure the Heart for Felting
10. Carefully slip the wool-covered heart into the nylon stocking, keeping the wool in place.
11. Wrap a rubber band around the stocking to keep the heart’s halves separated and
secured.
Step 5: Felt the Heart
12. Grate some soap into a bowl of warm water and mix to create soapy water.
13. Dip the heart into the soapy water, fully saturating it.
14. Using both hands, massage and squeeze the heart to begin the felting process.
15. Continue dipping, squeezing. After about a minute of dipping and squeezing hard (use a timer!) you can start rubbing- first gently and then firmer. and rub the heart against the
bubble wrap until you can see colors of the wool top migrating through the sock and it
all feels firm.
Step 6: Remove the Nylon and Continue Felting
16. Take the heart out of the nylon. Some wool fibers may have fused to it, but that’s okay.
17. The heart will still feel soft and soggy, so continue massaging and rubbing it to
strengthen the felt.
18. If certain areas feel too loose, use the back of a large spoon to gently “thrash” those
spots until they firm up.
Step 7: Finish and Dry
19. Keep working the wool until the heart feels fully felted and firm.
20. Towel dry the heart and let it air dry completely.
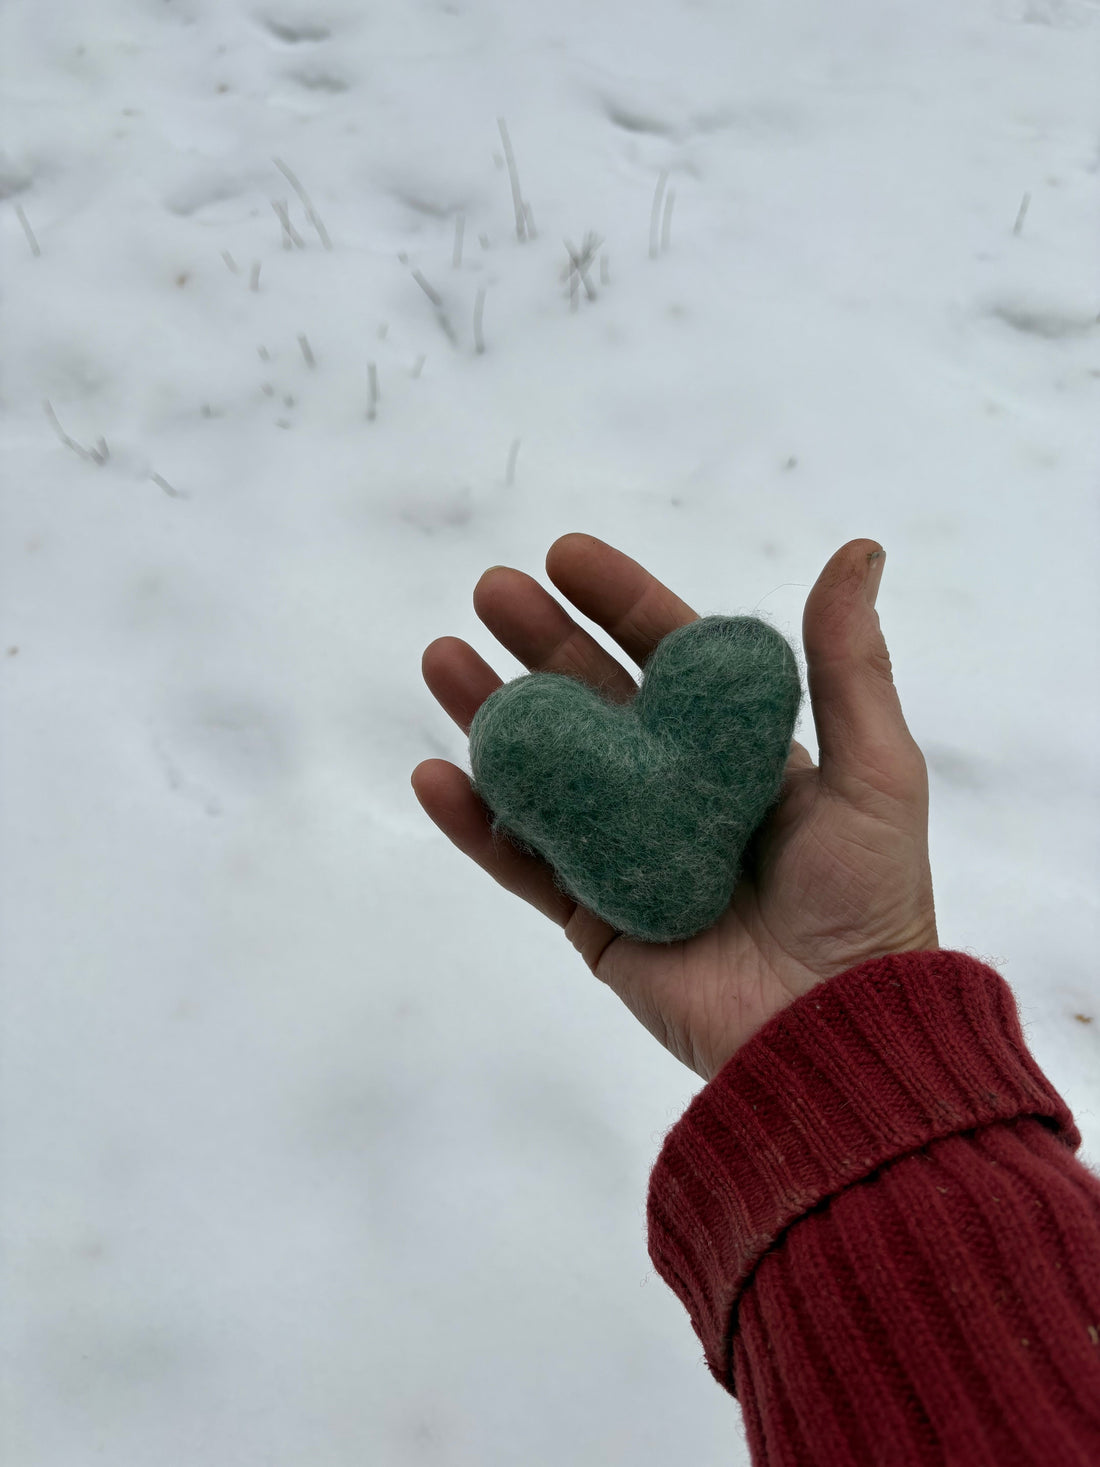
Your Felted Heart is Ready!
Now you have a felted wool heart diffuser that can absorb and hold essential oils or simply
serve as a soft, comforting item to squeeze and keep close.If you have other colors of wool top and a needle on hand you can needle felt decorations on it.